Electric opener for basement hatch(s?)

Hi all,
I mentioned a while ago that I was going to work up a design for making the basement doors electric. I'm not using the space under the mattress much simply because it's been problematic to get at it without moving things about. Having put the project on the back burner while I mulled it all over and then putting pencil to paper and doing the math, I have finally gotten around to doing something about it.
The guts of the plan are to install an electric linear actuator in order to open and close the hatch (complete with mattress and bedding) with the push of a switch. For those of you who are out of the loop on such things, a linear actuator is like a hydraulic cylinder, only electric instead. It pushes straight out and pulls back in. That's pretty much what it does. If you visualize the gas closer on your house screen door, you will get the idea.
I've spent a ton of time doing the math to determine the total weight and length I require and then went shopping to see what is available. Here's the one I've selected:
https://www.amazon.com/dp/B00NM8H5UA/ref=twister_B00NM8H5QE?_encoding=UTF8&th=1
It comes with the terminator brackets, which I may or may not use. It's rated for 330lbs maximum lift. You may think that's waaaayy too much force but consider that I'm laying it down at an angle and initial push will have to be much more than the vertical weight I feel when I reach in and pull the door up. I selected an actuator with a 10" travel. That doesn't sound like much but again, at the angles and offset I'm working with, 10" of linear travel will end up moving the door open about twice that. It's all in the geometry, which I won't post here.
As with all of my projects, I started with the basic idea how I wanted to accomplish it, then looked around at anything else I could include into the project as a sort of "many birds, one stone" kind of thing. In addition to the door project, I've been wanting to add a 110V outlet at the head of the bed as well as a USB charging station. As long as I was running wire for the actuator, I decided to put in a 110V circuit for the outlet as well. I also needed to (finally) put in some hinges to make the doors secure as I will be pushing on them so I set to work to make that go into the project. Here's where I'm at:
Once I selected and ordered the hardware, I broke the project down into various stages. Stage one was to run the wire and get it ready for the actuator. I got that all done today.
First order of business was to get all the "stuff" out. Mattress's and bedding etc, doors, various deck hardware and plywood. I wanted to run the wire circuits directly from the power supply. I wasn't sure where the water tank was (I found it Verna!) so I pulled up the floor to have a look.
I obviously couldn't run the wire under the floor down the left side of the camper because of the water tank and absolutely didn't want any holes in the floor so I elected to run it all down the center, cross over to the right side and go through the foot-wall under the radio. I wanted to utilize the hole I'd drilled for the thermostat wire. You can just see it at the back corner above the bedframe.
My switch and outlet are going on the wall about where the fire extinguisher was. I removed the fire extinguisher bracket and extinguisher. I removed the front bulkhead frame under the door and found the wires that (I think anyway) come up through the floor and go out to the fender clearance lights. It's a handy place to run my wires so that's what I did. You can see the green and white wires in this photo that are for the clearance lights.
My two circuits I've added (110V and 12V) are the two yellow wires you see here. There are actually three wires. Two are the supply circuits for the 110V and 12V, the third is for the 12V load circuit that goes back from the wall switch, under the floor and over to the actuator.
Here's the wire chase all tucked in with the bulkhead reinstalled. The big wire is the 110V and the two smaller ones are for the actuator.
To get my wiring back to the rear, I elected to run them down the center rib under the bed but on the right side. Here they are run to the rear bedframe bulkhead in covered wire chase. From there, they turn right and go over to the side of the frame and back to the radio bulkhead.
The wires come up through the floor at the rear corner and will go through the wall and over to the power supply behind the A/C unit.
Here's the new 110V outlet with USB charging ports. The 4 wires stuck through the switch hole will hook to the power switch for the actuator.
Here's the basic hinge layout, although there is more to do yet. I have them secured but need to add two brackets to hold the center hinge to the center rib and replace the center screws with #10 bolts with nuts. The center hinge is where most of the driving/lifting force of the actuator will press on so it needs to be solid in both lift and shear. I'll post a detail photo and explanation once I get the brackets installed. I am not putting anything else on until I have the actuator on hand to see where and how it fits.
But as the engineers say: "It should work...."
According to Amazon shipping, my actuator should be here Monday (out here in the sticks that usually translates to Tuesday) and I'm looking forward to getting it in there and hooking it all up. In the meantime, I need to pull the radio, A/C and power supply out in order to hook up my circuits and test them. I'll need a couple of hours to pry it all out and do the hookup. I also need to make a run over to the RV dealer for a DPDT switch. It's the same kind of specialty switch that opens and closes the slide-outs on campers.
I'll keep you informed.....
WilliamA
"When I am in charge, Starburst brand fruit chews will get their own food group....and where are all the freakin laser beams? There should be more laser beams..."
2021 Jeep Cherokee Trailhawk
2017 T@G XL
Boyceville, Wi.
Comments
-
Are you only doing one side for now?
Bill
2017 T@G Max XL, New Jersey.
You can drive along 10,000 miles, and still stay where you are. -
genius! Nice work!
-
Yeah, one side for now. I have it wired so I can tap in for the right side but there has been some interest here about using gas struts so I'm planning to work out the math on struts for that side. Struts are actually more complex because the geometry must accommodate a wide variety of weight without becoming too stiff or soft. Additionally, it will probably be better (not easier) to use 2 smaller struts vs 1 larger one. Putting struts on the ends of the hatch is the least desirable position mechanically because people will want to open and close from the center. The best place for the struts is close to the contact point where you'd put your hand. I'll be working that all out after I get this side sorted out. In any case, the research for the hinging, tiedown (more on that later) and geometry will work for either system as the forces and weight involved are the same. It's fun to do.
WilliamA"When I am in charge, Starburst brand fruit chews will get their own food group....and where are all the freakin laser beams? There should be more laser beams..."
2021 Jeep Cherokee Trailhawk
2017 T@G XL
Boyceville, Wi. -
Phase 2 is finished. I got my switch, did the wiring and tested it all electrically and tidied all the voltage up. I also did the hold-down bracket for the center hinge. All that's needed now is to install the actuator.
The switch for the actuator (it's a momentary up/down 12V 20A) is in and hooked up. I also have the outlet hooked up and hot. I tested the USB ports on the plug for noise in both am/fm and it seems to be quiet. The cheaper ones are electrically noisy. This is a good one. The single screw just above the box is the hole where the fire extinguisher had mounted. I could either cover the bottom or the top hole with the box. I'll fill it with epoxy and paint as soon as it gets warm enough for me to be motivated. When I bought the switch cover, I wanted to use it with the hatch switch flush with the outlet. Unfortunately, the box isn't deep enough to stuff the actuator switch and spade connectors in flush. I was able to get this small switch mount/cover and just mounted it on the switch cover (cover,cover,cover. Too many covers just there) to give me an added 1/4 inch of depth. Still tight, but just enough to clear things.

Here's the wall space now. I moved the Fire Extinguisher up to the cabinet above to be handy but out of the way of the other stuff.

Here's the center hold-down bracket I made for the hinge. Since the actuator pushes against the door and the hinges are attached to only the two doors, it will (potentially) pull the other side door up and out of the frame when moving, I needed a way to keep the center hinge from doing that. I made this small bracket. I don't think there's a need to make the same bracket for the other two hinges. All of the transfer force of the actuator acts directly on the line of the center hinge. There's no need for the other two hinges to try and move up. Notice I've cut a small slice off the head of the hinge pin.

Here's the bracket screwed down without the hinge pin in place. The larger screw next to the hinge pin head is to provide a bit of a lip to keep the hinge pin from working out over time.

Here's the finished product. The other hinge screws will be replaced by #8-24x3/4" machine bolts with blind nuts for the back of the hatch. Just need to pick them up on my next hardware run. I feel that wood screws won't hold in the door laminate for very long. As an absolute minimum, one of the screws in each hinge (the center one) needs to be a machine screw with a captured nut on the back.

Now it's just go out and wait for the UPS man to bring the actuator.
WilliamA
"When I am in charge, Starburst brand fruit chews will get their own food group....and where are all the freakin laser beams? There should be more laser beams..."
2021 Jeep Cherokee Trailhawk
2017 T@G XL
Boyceville, Wi. -
Fedex was johnny on the spot today and my actuator arrived at 2:30. I made myself useful by putting it in. Intallation went as expected. Not much of a job with just a few "adjustments". Once in, I hit the switch and it worked great. I loaded the hatch cover with mattress and bedding and it still worked great. Here's the finished work minus some cleanup and a bit of detail work grinding corners etc.
Here's the actuator installed.

I've added a 36" piece of 1" aluminum angle to spread the strain out and stiffen up the hatch edge.

The whole point of the excercise was to be able to lift the hatch, mattress and bedding without removing anything. It does that very well. Now I don't have to move anything in order to get to my stash of junk. I'm now going to move all of my umbilicals and setup stuff under there which will make room in my front box for other things, like my fishing gear.

WilliamA
"When I am in charge, Starburst brand fruit chews will get their own food group....and where are all the freakin laser beams? There should be more laser beams..."
2021 Jeep Cherokee Trailhawk
2017 T@G XL
Boyceville, Wi. -
WillaimA...The best yet!
Tom
Aptos, California
2015 LG Silver Shadow
2012 Ford Edge Sport TV -
Thats just crazy amazing to me.
Bill
2017 T@G Max XL, New Jersey.
You can drive along 10,000 miles, and still stay where you are. -
Dude has mad engineering skills. I'm impressed.
Ed & Karen
2017 T@G Max XL
2018 Subaru Outback 3.6R -
I've had a couple of requests to post a video of the hatch so I made one.
Let's try this and see how it works.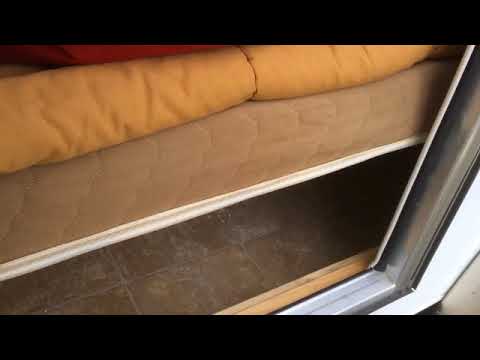 https://youtu.be/mAQth1Ka78w?t=6
The video is "realtime" which means I've not sped it up nor slowed it down.
WilliamA
"When I am in charge, Starburst brand fruit chews will get their own food group....and where are all the freakin laser beams? There should be more laser beams..."
2021 Jeep Cherokee Trailhawk
2017 T@G XL
Boyceville, Wi. -
Smooooooth! Thank you @WilliamA !
Twojs&Guinness&OD
-
What I did to insert the video was to (I edited your post William) right clicked on the original YouTube video, selected "copy video URL at current time" and pasted it back into your discussion. That way you see the actual video and can make it run immediately.
Michigan Mike
Linden, Mi
2019 T@B 400 -
Amazing. I want this mod! As a newbie, this will have to wait, but not for too long. Thank you.
-
Cool! Thanks Mike! It's been awhile since I did any linking..
WilliamA
"When I am in charge, Starburst brand fruit chews will get their own food group....and where are all the freakin laser beams? There should be more laser beams..."
2021 Jeep Cherokee Trailhawk
2017 T@G XL
Boyceville, Wi. -
I’ve watched this several times. Each time I laugh hard because it’s so cool. It should be a NuCamp option in the future.
Tom
Aptos, California
2015 LG Silver Shadow
2012 Ford Edge Sport TV -
Nice, but this make me think that gaz struts with a good latch could be very interesting. Quick, light and power less.
But nayway, very good job!
-
WilliamA, I love it! Do you have a link or item number from Amazon for the actuators you used? Thanks
Bob Richert
2018 T@G Outback
2017 Jeep Rubicon
Ranger the Golden Retriever -
Hey @BobR - I think that link is in the original post here at the top.
Twojs&Guinness&OD
-
@2jgcampers said:
Hey @BobR - I think that link is in the original post here at the top.Thanks, I missed that on the first pass through!
Bob Richert
2018 T@G Outback
2017 Jeep Rubicon
Ranger the Golden Retriever -
Yah, you betcha. Then I worried @WiiliamA might have changed his mind and gone another route since we all do that but I didn't have the patience to go through it all. It is such a fine mod, but he lost me at "actuator"! Have fun!
Twojs&Guinness&OD
-
Thanks all. I appreciate the comments. If you've got any more questions I'll do my best to answer them.
I CAN say that it's working well and I love it. Now when I need something out of my "stash" I just throw the switch without thinking about it, as if it was always there. The best thing that can be said about modifications like this is when they get seamlessly integrated into the routine. I have more fiddling to do on it (call me "Monk") but will wait until warmer weather. I'm also planning to do the other side.
WilliamA
"When I am in charge, Starburst brand fruit chews will get their own food group....and where are all the freakin laser beams? There should be more laser beams..."
2021 Jeep Cherokee Trailhawk
2017 T@G XL
Boyceville, Wi. -
Wow! Great idea and would definitely make life so much easier since having two spinal surgeries! Amazing idea and great job!!


Categories
- All Categories
- 3 Forum Rules
- 2 nüCamp & Forum Contacts
- 2 uCamp Rally - News & information
- 65 Air Conditioning & Refrigeration
- 297 Battery/Electrical & Solar
- 196 Camping & Travel
- 21 Events & News
- 1 "FOR SALE" - New & Used Trailers
- 3 "FOR SALE" - Camping & Trailer Gear
- 104 Heating/Plumbing & Winterizing
- 38 Help - Computer & System
- 135 Introductions
- 36 Looking to buy a Trailer?
- 379 Modifications & Upgrades
- 62 Newbie 101 Tips
- 126 Products & Accessories
- 19 Service/Maintenance & Recall Notices
- 3 Solo Travelers Hints & Tips
- 2 T@B Forum
- 5 Testimonials
- 30 T@G & Factory Comments
- 2 Teardrop Groups & Helpful Links
- 75 Tips & Tricks
- 130 Trailers & Towing
- 10 User Manual/PDF Files/Videos & Resources