Anybody using Harbor Freight 100w solar kit

Anybody using this? How well does it keep up to your power needs? Will it just plug directly into the solar connector on the 2018 T@G. How do you stow the contoller (pics if you have them)?
“I'm T@G-ing Out"
Jay
Comments
-
Had a 45 watt HF system for other purposes. If the 100 watt weighs what the 45 watt did and if it is a similar size, you will find it too heavy and awkward to travel with. Electrically speaking it did what it said it would, but it was so awkward to use it lived most of its life in the garage until I sold it. I have a Renogy 100 watt suitcase and like it fine...travels well and setup is a breeze.
2014 T@G
-
I just bought a 2018 T@G. Where is this solar connector that you refer to?
-
Sorry for having to repeat this thread but it disappeared from the forum. I can see the topic in my postings list but the link comes up not found. Anybody that responded, I'd appreciate a repeat (plus any new opinions).
Anybody use the 100W Harbor Freight solar set up? If So, how did it keep up with your energy needs? Any recommendatuons for mounting the controller?
I have a 2018 T@G Boondock XL and plan to keep fridge, k-cup machine, fan, and misc USB outlets in use.
“I'm T@G-ing Out"
Jay -
For the record, I have no idea what happened to the first discussion. There was not a forum problem with the subject or answers......gremlins?
Verna
T@B/T@G Admin -
@Fourman110 I found your post. I need to do some investigating.
-
@mikewingo1955 said:
I just bought a 2018 T@G. Where is this solar connector that you refer to?Sorry Mike, based on the following youtube video (and a couple other pics I'd seen on line), I thought it came with one. Just instant messaged with NuCamp and they said 2018 And newer does not come with the solar recepticle.
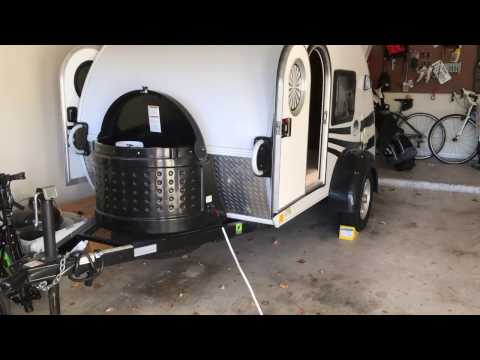 https://www.youtube.com/watch?v=tXgIWv9Nblk
Great... one more thing to do......
“I'm T@G-ing Out"
Jay -
Picked up the Harbor Freight kit yesterday and will be testing out the setup tonight. For my first trip in a couple of weeks, I'll probably just use the clamps directly on the battery. If everything works as planned, I'll hard mount the controller to the tub cover and figure out a way to hard mount the Zamp style connector.
Compared to Zamp the setup is a fraction of the price (in fact at Zamp price, it'd be tempting to get a small generator). The weight is a bit more for the HF vs the Renogy, but comparing only about 22% more (correction: looks like Renogy suitcase is a little less than 1/2 the weight). At more than 2X price difference, it's hard for me to pick the Renogy even with the sometimes spotty quality of HF. My camping at sites without power will likely be fairly few days per year. I figure in the worst case, I can sell off a used HF and have the confidence that solar was the way I wanted to go.
“I'm T@G-ing Out"
Jay -
Thanks Fourman. It seems that NuCamp is leaving several of the extras off of the T@G since they took them over.
-
Mike, I think NuCamp, formerly Pleasant Valley Trailers, is the originator and only builder of the T@G. My understanding is that they partnered with LG for the marketing end of the business.
Ed & Karen
2017 T@G Max XL
2018 Subaru Outback 3.6R -
@OutdoorEd is correct.
-
I suspect Zamp had an arrangement for nuCamp to install the plug hoping to lead to sales and the deal expired in 2017 without renewal.
-
Would have been nice if they would have left the hole for it with a plug. I'm still plotting how I want to set up a more readily available solar setup
Installed the controller in the tub yesterday. For now I'll be using the battery clips on the next trip. Picked up a harness from the battery with 15a breakers but I want to put a switch to disconnect so I'm not always powering the controller.

“I'm T@G-ing Out"
Jay -
I installed a panel mount Anderson Powerpole rated at 45Amps, there are 30Amp inline fuses in the battery box to each of the connectors. At the moment I use it for Amateur Radio and have been using powerpoles for years. I also have an adapter to plug into the DC side of the generator to charge the battery instead of removing the battery cover and attaching clips.
If you do go down the Anderson powerpole road you will need a special crimper. I would not call this connector waterproof. Weather resistant...kinda. I will be adding an aluminum escutcheon to help with environmental issues.

All the calculations show it can’t work. There’s only one thing to do: make it work.
-
-
@Fourman110 said:
Looks pretty nice!Looks nice indeed!
")
-
Fourman110: Very tidy install of controller in the tub. Was wondering though, is the controller water proof? When I drive in the rain everything in the tub gets wet is why I ask. I noticed the Harbor freight manual says, "Install the charge controller/regulator and batteries in a weatherproof enclosure with proper ventilation."
2014 T@G
-
Definitely not water proof. I'm going to cover up ports not used with a bit of electrical tape. So far, I haven't seen much water in that area (my tub has an opening in the back, but that's about it. It's just the back of the tub open on mine.
I'll also not be tied directly to the battery when I drive (really looking forward to moving to a switch instead of manually using the alligator clamps). I still need to figure out what side I want to hook the switch up to (red or black). Most of the wiring diagrams show switch on the red side, but I've read numerous posts on always posting to the black.
“I'm T@G-ing Out"
Jay -
Keep in mind that by putting the control (switch) in the ground circuit does not kill power to the load from the source. Interrupting the ground will stop current flow but leaves the hot circuit active all the way through the load and the ground circuit will be "hot" from the load all the way back to the switch. Putting the interrupter in the hot circuit as close as feasible (within reason) to the source (in this case, the battery) is the safest way. It kills all potential current in all of the circuit beyond the switch. Let me repeat that for emphasis: Putting the switch in the ground circuit leaves the GROUND wire between the load and switch electrically hot. Yes, hot. Control devices (with a few exceptions. Certain types of shunts might be put in the ground circuit or safety switches such as low oil shutoffs might be placed on the ground, but almost always when working in series with another control) should always go on the hot wire. For our purposes, there's no good reason to switch the ground circuit...
In my opinion...
WilliamA"When I am in charge, Starburst brand fruit chews will get their own food group....and where are all the freakin laser beams? There should be more laser beams..."
2021 Jeep Cherokee Trailhawk
2017 T@G XL
Boyceville, Wi. -
Appreciate the feedback WilliamA! Red it will be.
Overall the solar setup was a huge benefit this past 5 days. No power except for a boost from the panels. Kept things limited to the fridge, an occasional light, and about 10 mins of TV per day to check weather. Good thing we had the TV as we had zero cell phone reception (my kind of place) and some severe weather systems running through the area.
Prior to adding the kill switch between the battery and controller, I need to take a run through electrical needs calculations to make sure my battery is sized correctly. While it would charge up to full, the battery would die off faster than I would have thought. Suspect I did some damage to it over the winter.
“I'm T@G-ing Out"
Jay -
For those who are running on solar power, look into “Luci Lights” on Amazon. I camp for 4+months in Arizona every winter (I hate cold Hoosier winters any more!) and I use clear solar rechargeable Luci lights in the evenings inside. The evenings come early and cool off quickly, so I rely on my Luci lights to provide for the evening light inside. I charge them in the sun every day, and they are remarkable for the light they provide and for how long they last between charges.
-
Added a cutoff switch to the battery so I wasn’t always running the controller. Have this under My Mods as well but to keep the topic together....
I purchased a long two wire harness with two 30amp fuses and lug terminals on the end. My solar uses a raw wire end that gets attached with a set screw. I cut about 8 inches of the negative off,colored the cutoff part red with a marker and used this short piece to connect from the switch to the solar controller. As I mounted the switch above the controller, I ran the wires in a gap behind the controller.
The remainder of the negative side went from the battery directly to the controller.

“I'm T@G-ing Out"
Jay


Categories
- All Categories
- 3 Forum Rules
- 2 nüCamp & Forum Contacts
- 2 uCamp Rally - News & information
- 65 Air Conditioning & Refrigeration
- 297 Battery/Electrical & Solar
- 196 Camping & Travel
- 21 Events & News
- 1 "FOR SALE" - New & Used Trailers
- 3 "FOR SALE" - Camping & Trailer Gear
- 104 Heating/Plumbing & Winterizing
- 38 Help - Computer & System
- 135 Introductions
- 36 Looking to buy a Trailer?
- 379 Modifications & Upgrades
- 62 Newbie 101 Tips
- 126 Products & Accessories
- 19 Service/Maintenance & Recall Notices
- 3 Solo Travelers Hints & Tips
- 2 T@B Forum
- 5 Testimonials
- 30 T@G & Factory Comments
- 2 Teardrop Groups & Helpful Links
- 75 Tips & Tricks
- 130 Trailers & Towing
- 10 User Manual/PDF Files/Videos & Resources